Deepin下部署hexo博客
1.安装必要的软件包
apt-get install npm新建blog目录,用来存储博客的相关文件
mkdir blog 进入blog目录下
cd blog
npm instlal -g hexo-cli
npm install hexo
npm install hexo-deplopyer-git
初始化hexo
hexo init
2.设置主题
下载主题
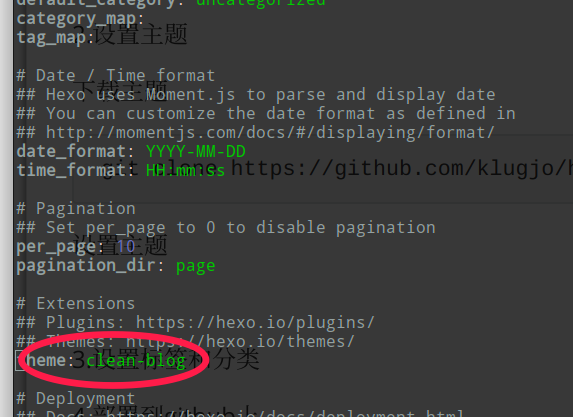
git clone https://github.com/klugjo/hexo-theme-clean-blog.git themes/clean-blog设置主题
vi _config.yml
3.设置标签和分类
hexo new page tags
hexo new page categories会在以下目录生产tags和categories目录和对应的index.md

修改两个index.md
1 | title: categories |
检查主题配置文件里面是否开启了标签和分类
发布新文章的时候要引用tags和categories
1 | title: Tcp-three |
4.部署到github上
生成ssh公钥ssh-keygen -t rsa -C "邮箱"
cat .ssh/id_rsa.pub
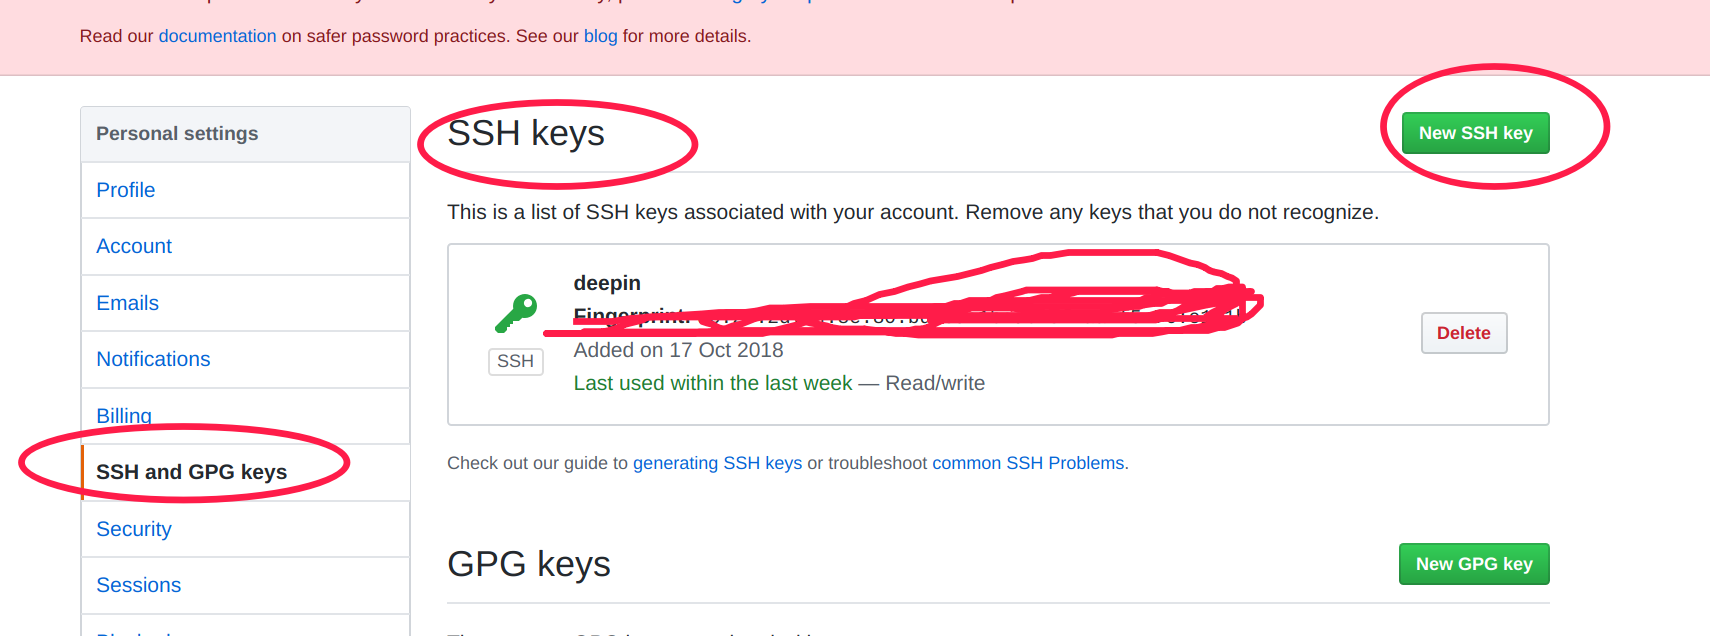
在github上设置ssh配置
把cat的结果贴到github这里
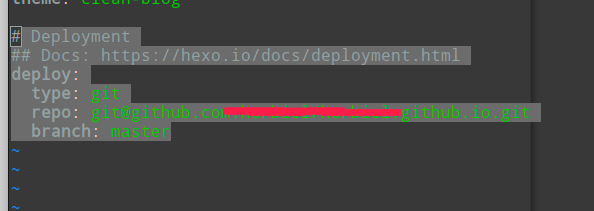
配置相关信息
vi _config.yml

运行hexo d
5.hexo 常用命令
查看帮助 hexo --help
hexo g 生成静态文件
hexo clean 清理生成的静态文件
hexo new "文章名" 新建文章
hexo d部署
hexo s本地服务器模拟,访问localhost:4000可以看到效果